3.1 Equity Governance
In this article, you'll learn how to navigate the Equity Award Dashboard on the Qapita platform. The dashboard is built to make equity tracking easier, save time, and provide a clear snapshot of the company's equity status.
Begin by familiarizing yourself with the Equity Award Dashboard. This dashboard provides a comprehensive overview of all the important aspects - from employee equity details to pending tasks. This way, you can quickly access everything you need without unnecessary searching.
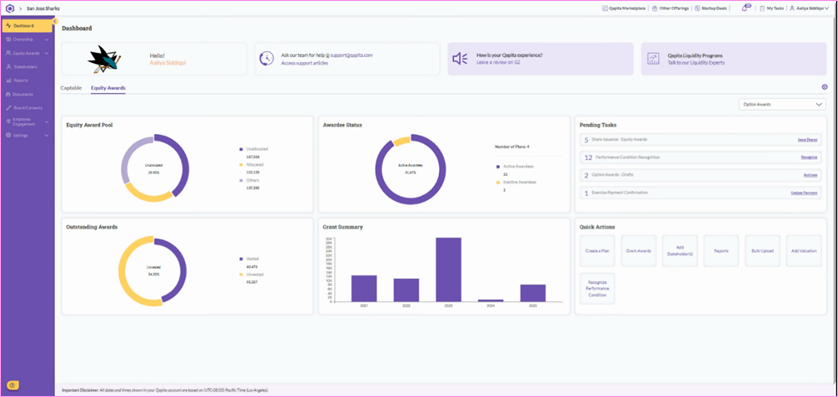
Take a look at the various widgets available. These widgets provide insights into your Equity award pool, Awardee status, and Pending tasks.
- Equity Award pool – You'll see a pie chart that visually breaks down your equity pool into allocated and unallocated portions, providing a clear picture of what has been utilized and what remains available.
- Awardee Status – View the total number of plans created and track the status of awardees, distinguishing between active or inactive individuals.
- Outstanding Awards – Displays a breakdown of vested and unvested equity awards from the total outstanding grants.
- Grant summary – Shows the number of grants issued each year, making it easier to track of grant distribution over time.
- Pending tasks – List of tasks that need to be completed, such as recognizing performance conditions, issuing shares upon equity award exercises, and managing activities related to exercise payment.
- Quick Actions – Use the key features menu for direct access within the platform.
|
To build the Equity Award Dashboard, start by setting up an Equity Plan in two key steps by creating a pool to define the shares available then linking it to the plan.
Step 1: Create the Equity Award Pool
Go to Equity Awards > Pools > Add Pool - Fill out the required details > Click Add Pool to complete the process:


Step 2: Create the Equity Award Plan
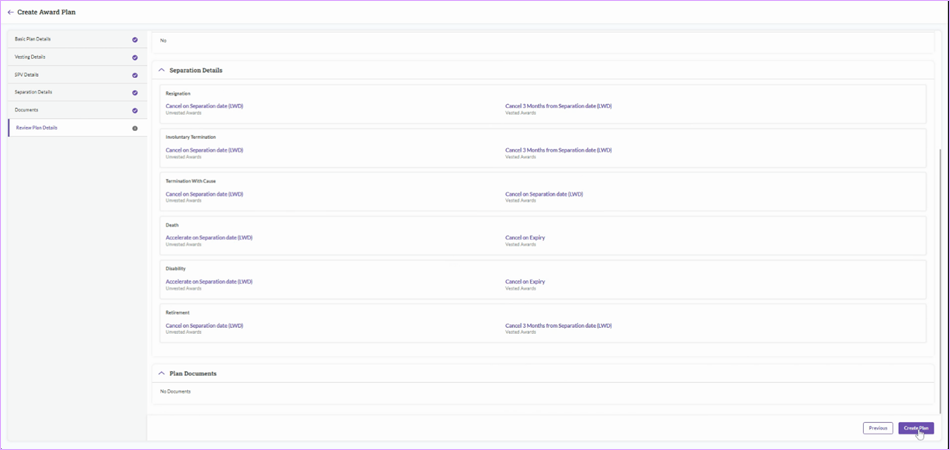
Go to Equity Awards > Plans > Create an Award Plan > Fill out all the required fields - select award type, choose a vesting template, configure termination rules, and upload any necessary documents > Review the plan details > click Create Plan to finish the setup:
Similarly, you can make additional plans as needed, such as RSA, RSU, or Phantom Stock. Once all required plans are created, proceed to Equity Awards > Grants to begin issuing grants to grantees.
Board Consent
The Board Consent feature on Qapita enables companies to digitally create, circulate, and record board approvals with ease. Instead of relying on scattered email threads or manual sign-offs, Qapita lets you draft resolutions, send them to board members for e-signature, and monitor consent status – all in one place.
This feature streamlines the approvals process for key decisions such as share issuances, grants, or compliance matters, ensuring they are handled efficiently, securely, and in compliance with governance best practices.
|
Here’s how to configure a Board Consent activity:
Step 1: Board Consent Set Up
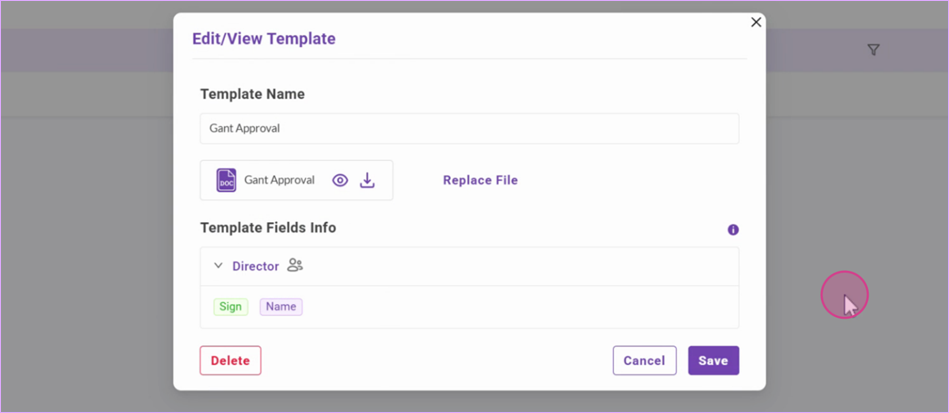
First, navigate to the Board Consents section from the left-hand menu > Click on Manage > Templates > Select + Create new template > Upload a .docx document with the appropriate tokens

Step 2: Template Review
After uploading your .docx document, confirm that the board consent template has been successfully created. You should see two tokens that have been updated to [sign] and [name] - indicating where the board member’s signature and name will appear.
Step 3: Add Participants
Return to the Board Consents page, then go to Manage > Participants. Participants are the individuals who will receive and act on the board consent.
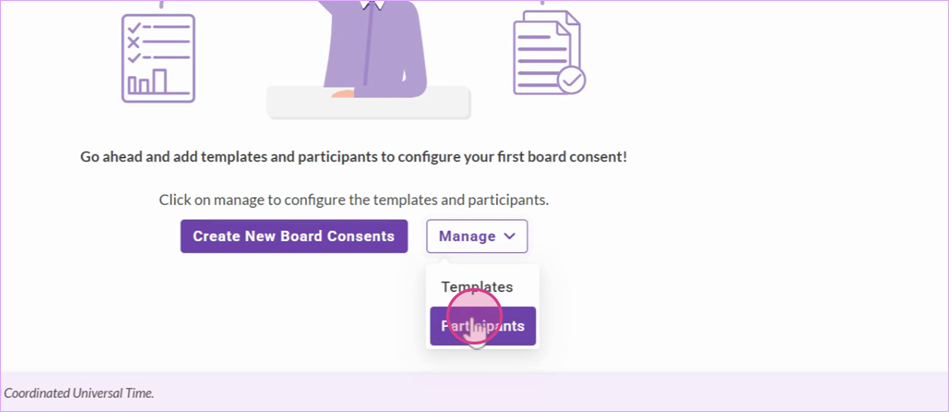
Another option – rather than adding each participant manually – is to use the Import from Excel feature to save time.
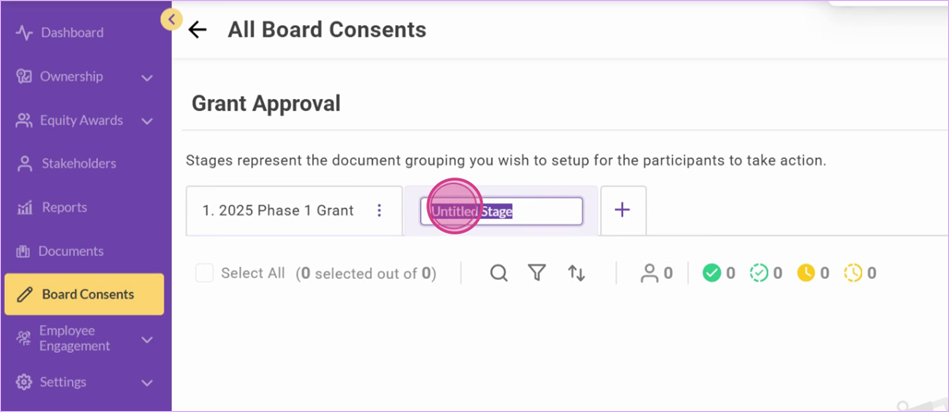
Step 4: Add Board Consent Activity
Now that the Board Consents templates and participants are set up. Return to the Board Consents section and click Create New Board Consents.

Step 5: Sending Board Consents
Enter the required information in the Board Consents section. If you need to send additional documents related to the same board consent, you can create multiple activities by simply clicking the ‘+’ button and rename the activity:
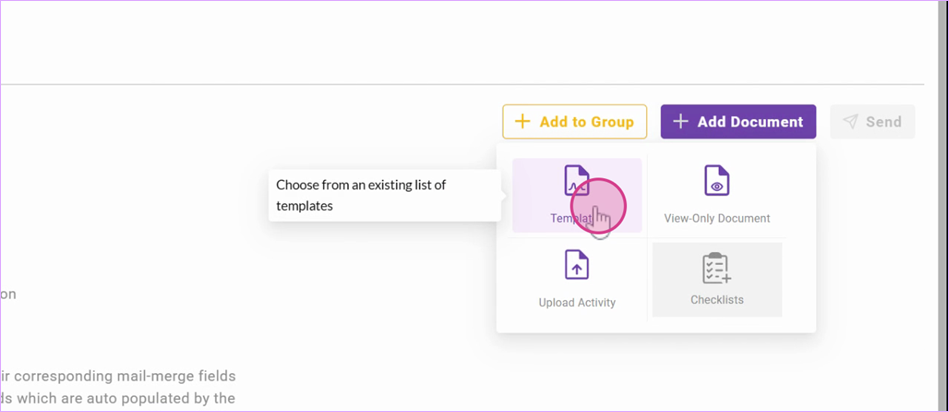
At the top right corner, click + Add Document > Select the template and name the workflow.
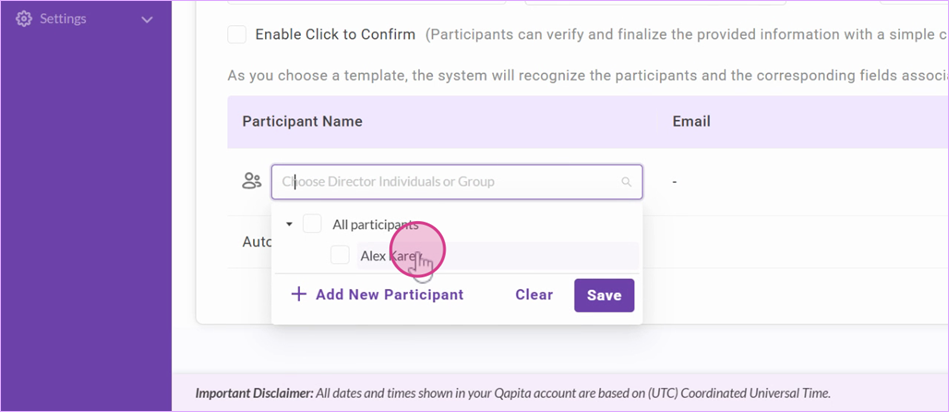
Next, select the participants and save the board consent. It will then be ready to send for signatures, and the status will update as everyone signs. You’ll also be able to view or download the document at any time.
If you’d like participants to receive an invitation notification, you can click on Participants and send that as well.

Was this article helpful?
That’s Great!
Thank you for your feedback
Sorry! We couldn't be helpful
Thank you for your feedback
Feedback sent
We appreciate your effort and will try to fix the article