3.4 Employee Onboarding
Standardizing onboarding stakeholders and stock options reduces errors and delays, ensures plan and approval compliance, and gives new hires clarity on their ownership from day one. It creates a single source of truth across HR, Finance, and Legal, scales smoothly as headcount grows, and strengthens employee engagement with equity.
Qapita provides a structured workflow to add stakeholders and issue stock options, RSUs, RSAs, import or create stakeholder profiles, apply plan/grant templates with vesting and key terms, generate grant documents for e‑signature, and track acceptance.
|
Get started with Qapita by adding a new stakeholder, creating an award plan, and issuing a grant. By following these steps, you'll manage equity details easily and ensure accurate record keeping.
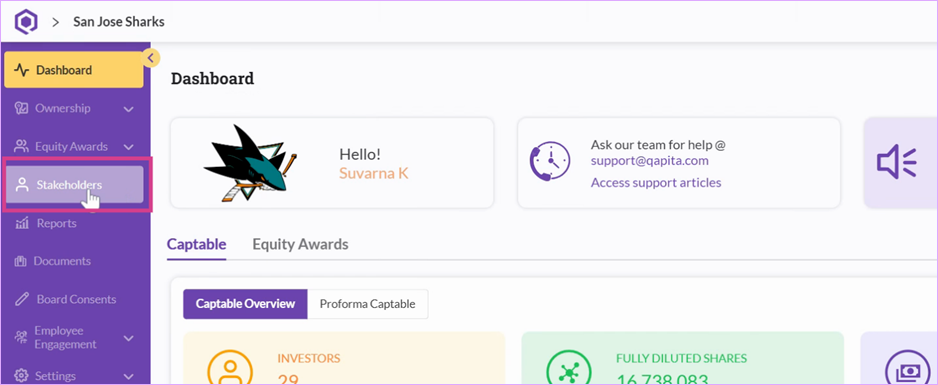
Step 1: Add a New Stakeholder
Go to the Stakeholder section on the left panel.
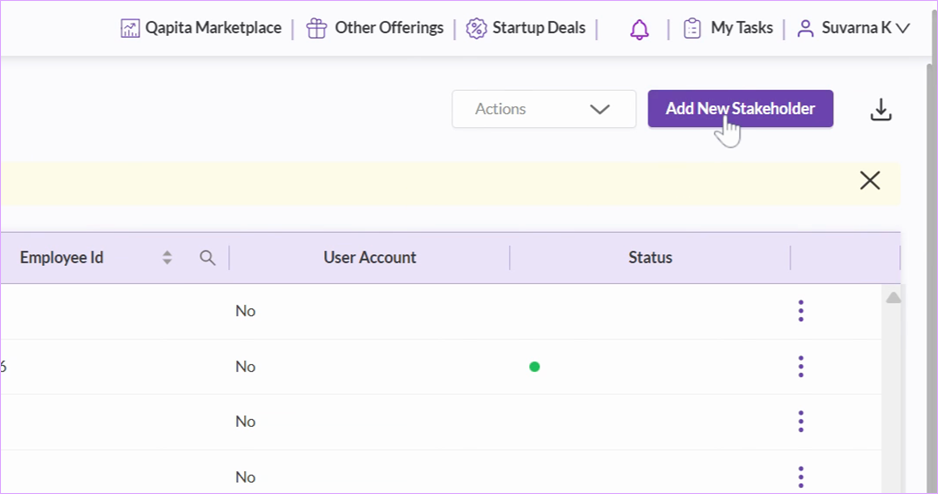
Click Add New Stakeholder at the top right.
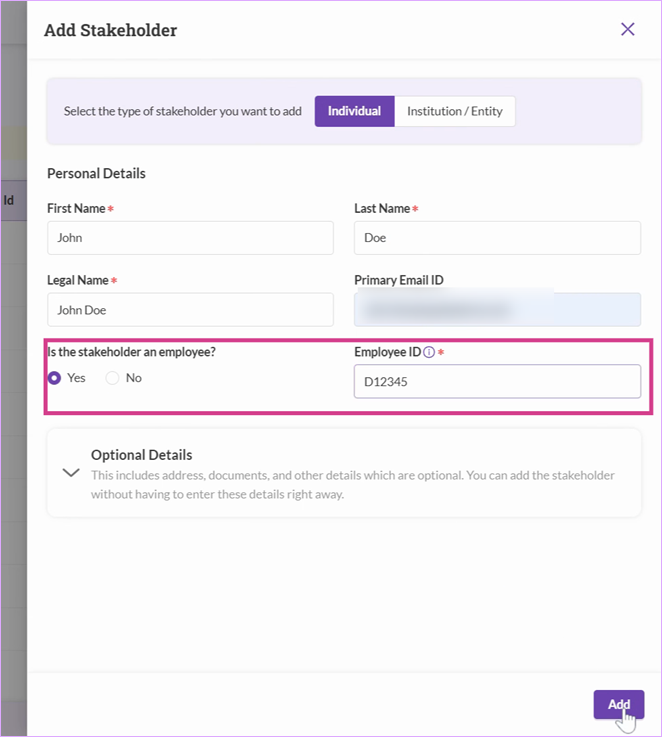
Enter details such as First Name, Last Name, Legal Name, and Primary Email ID.
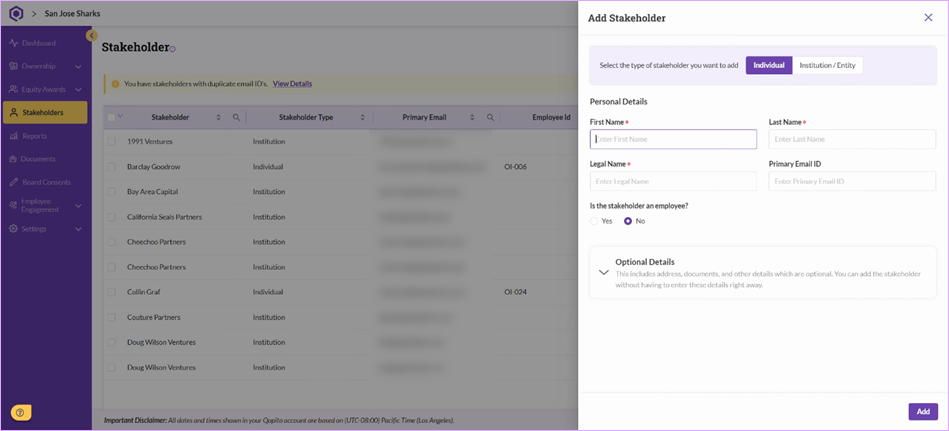
If the stakeholder is an employee, Employee ID becomes mandatory for employees. Complete all required fields and select Add.
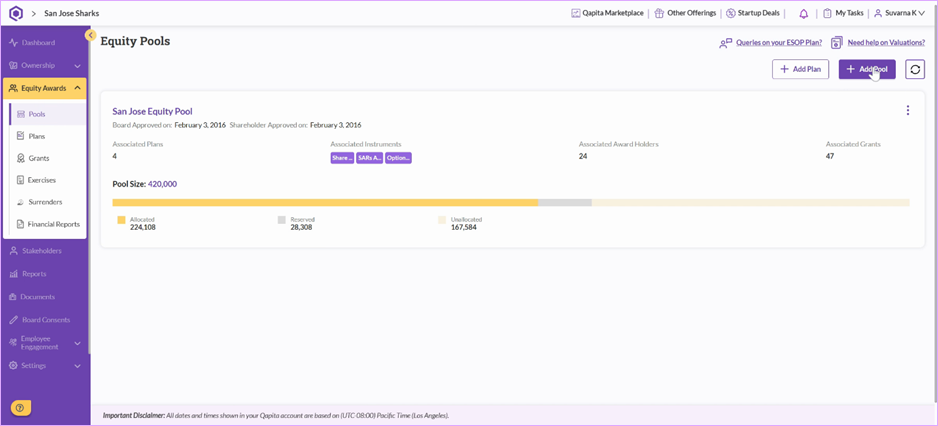
Step 2: Create a Stock Plan
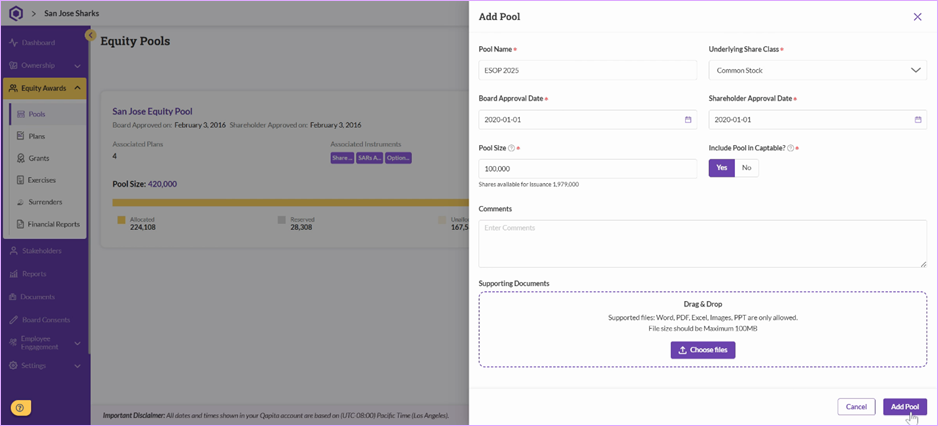
Once the stakeholder is added, create a pool to allocate awards. Go to Equity Awards > Pools and select Add Pool.
Enter the pool name, select the underlying share class, and provide board approval date, shareholder approval date, and pool size.
Note: Ensure you create a security class before adding Equity pool. This share class is utilized to issue shares when exercises are recorded on the platform.
For cap table inclusion, select Yes at the prompt.
Upload supporting documents if required and click Add Pool.
Note: Cap table inclusion represents, if the pool should be counted under fully diluted shares.
Step 3: Proceed to the Plan section. Click Create Award Plan.
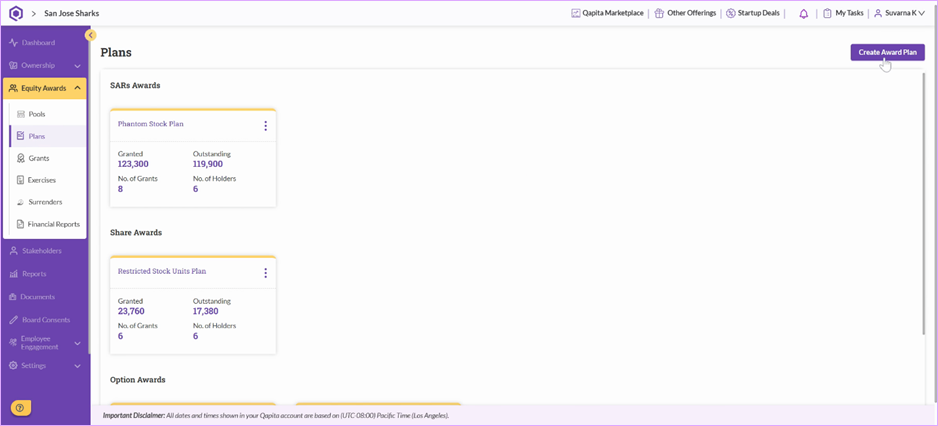
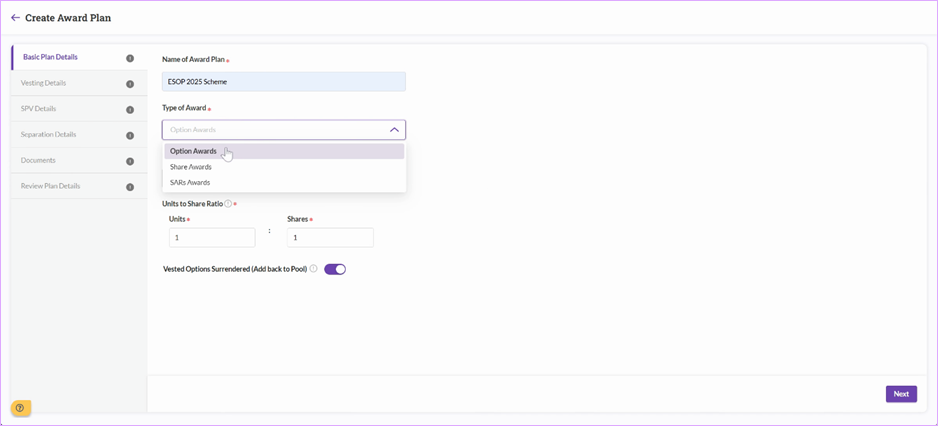
Fill in award plan name, type of award, and select the associated pool.
Basic Plan Details:
- Type of Award indicates - Type of instrument allocated.
- Option Awards - Stock Options
- Share Awards - RSUs/RSAs
- SARs - Phantom stocks/Cash settled awards
- Units to Share ratio represents the number of shares issued to stakeholders when stock options are exercised.
- 1 Unit: 10 Shares indicates = Stakeholder will receive 10 shares on the event of exercising 1 unit.
Vesting Details
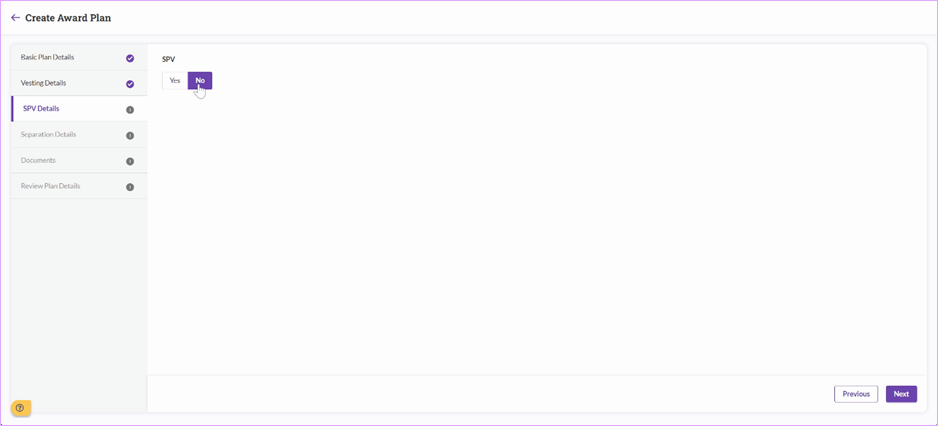
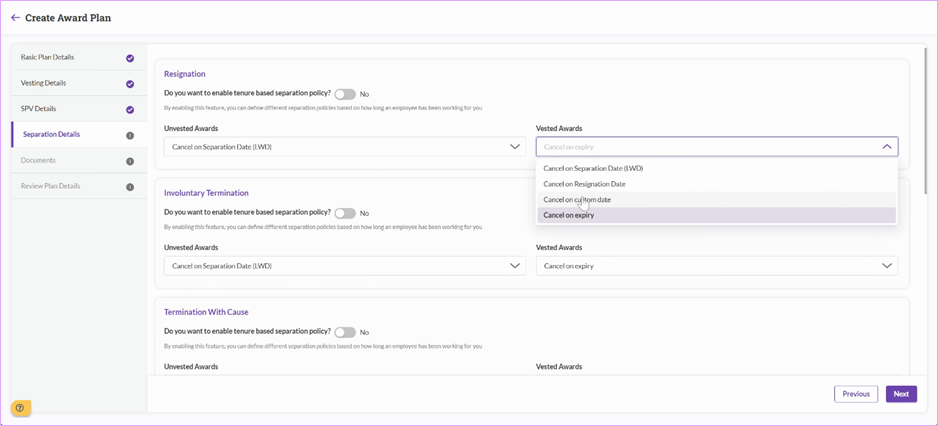
Choose or create a vesting template. If the plan uses a special purpose vehicle (SPV), select SPV Yes. Add separation details such as involuntary termination, resignation, cause, death, disability, and retirement.
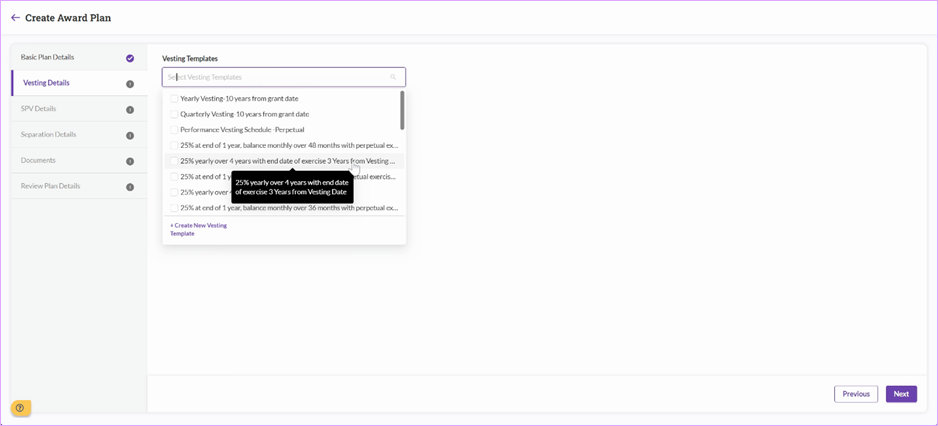
Note: SPV is utilized if a Trust vehicle issue shares to employees after exercise.
- Separation/Termination details - Termination rules will control the option movement when an employee is marked terminated on the platform.
- Cancel on Expiry - Stock options are active until cancelled.
- Cancel on custom date - An expiry date is defined.
- Example - For an ISO grant - 3 months from Separation date or Resignation date (LWD - Last working date)
Note: Tenure based separation policy is utilized to define the expiry period based on the tenure of the employee.
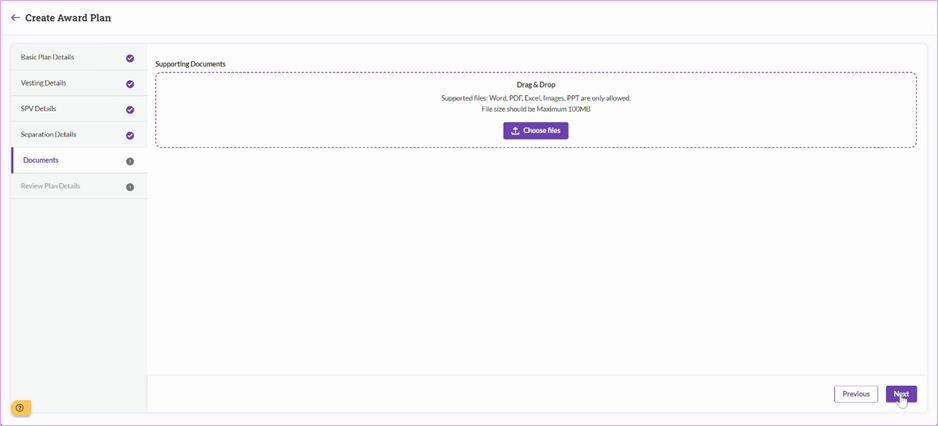
Additional separation/termination options are configurable through Master Configuration. Attach plan documents as needed. After confirming details, create the plan. The new plan can grant options to both new and existing stakeholders.
Step 4: Issue a Grant. Navigate to the Grants section and select Grant Award.
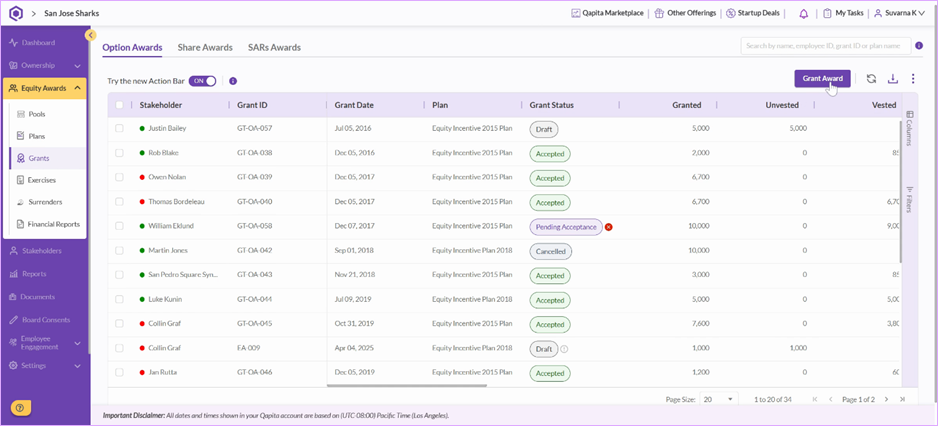
Provide information such as stakeholder, plan pool, number of units to be granted, grant type, date, strike price, and share price.
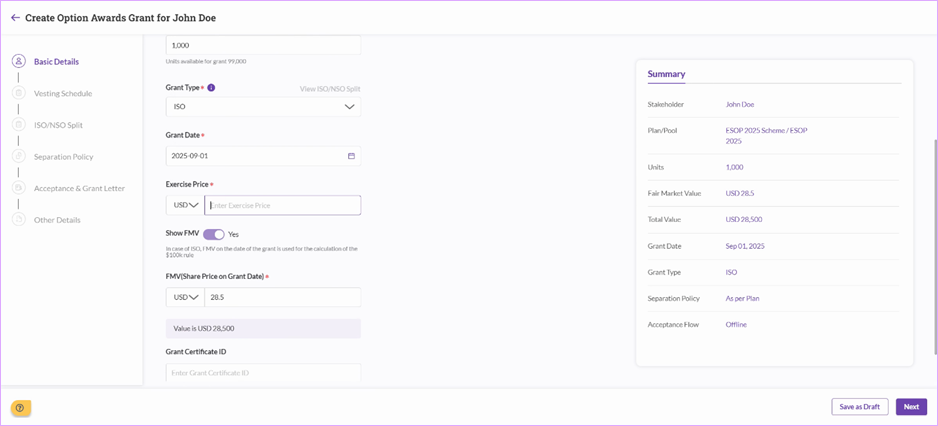
Click Next to review and adjust the vesting schedule, if needed.
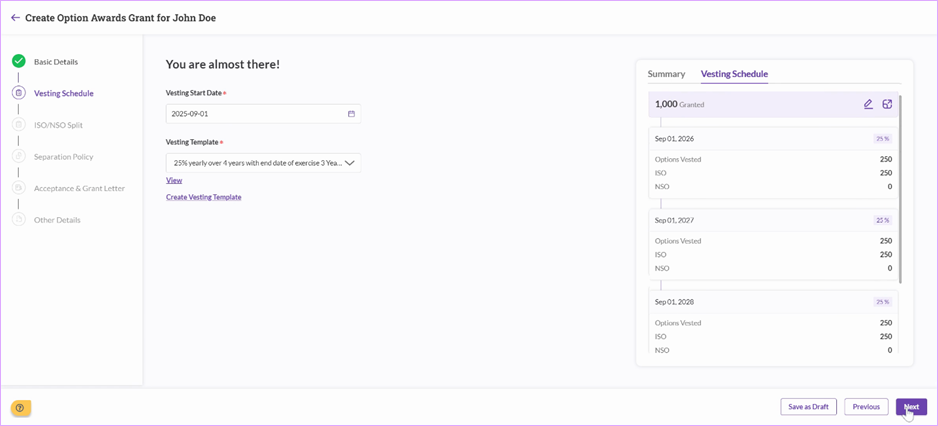
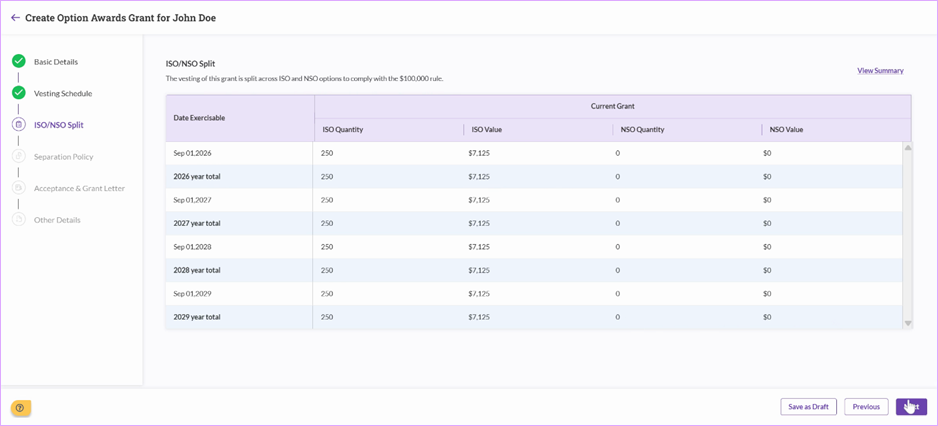
ISO/NSO Split will be calculated, if applicable.
Step 5: Review and Manage Grant Separation Policy Continue to the review step. The termination rules are pulled from the stock plan.
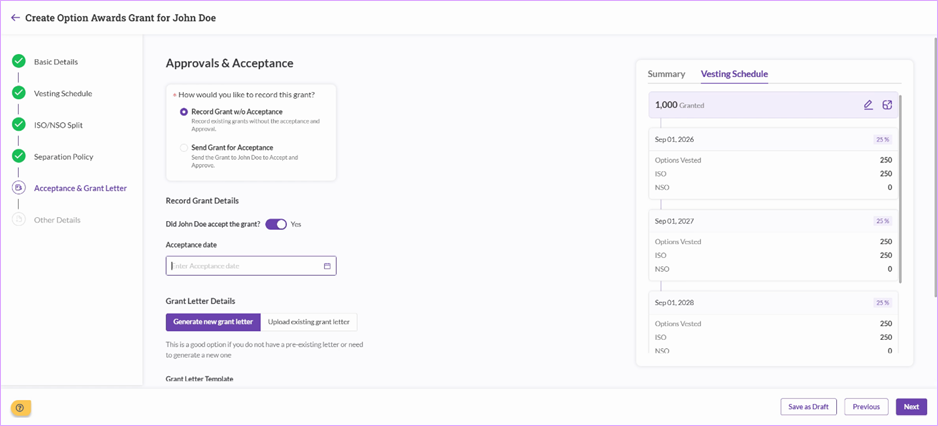
Step 6: Create Acceptance and Grant Letter Set up approvals and decide if the grant should be sent for online acceptance or just recorded.
Note: Grant letter is mandatory if the stakeholder is required to digitally sign the letter.
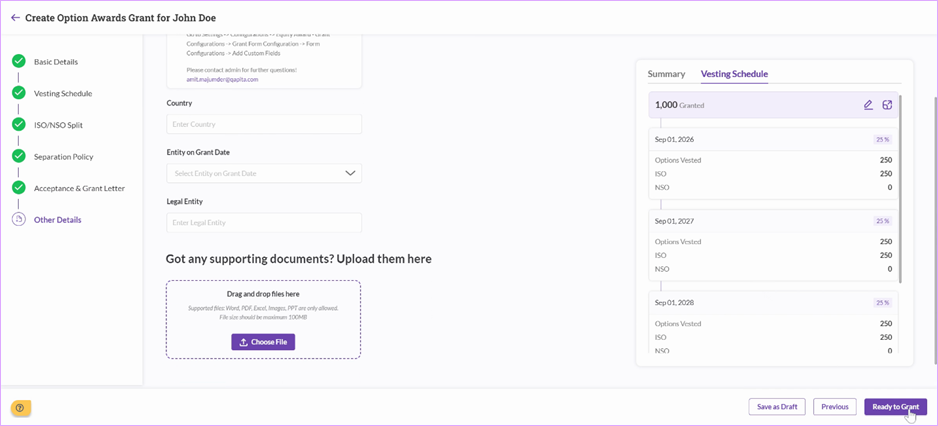
Other details are optional - these details can be customized or added to provide an extra layer of information at a grant level. These other details can be customized from Settings > Configurations > Grant Form Configurations > Form Configurations.
Step 7: View the Issued Grant - the completed grant is now visible for review.

That's it! You've added a stakeholder, set up an award plan, and granted equity using Qapita.
Things to note
To complete plan participant onboarding for a large group of employees, please leverage the Bulk Upload functionality instead. Bulk Upload templates follow similar logic, and the same information will be required to be populated.
Was this article helpful?
That’s Great!
Thank you for your feedback
Sorry! We couldn't be helpful
Thank you for your feedback
Feedback sent
We appreciate your effort and will try to fix the article