3.2 Data Governance
To efficiently manage both individual and institutional stakeholders in Qapita, start by configuring Stakeholder Settings.
|
Go to Settings > Configurations, then locate the section labeled Stakeholder Settings > Stakeholder Configurations. From here, you can manage all stakeholder-related configurations to ensure everything is set up correctly.
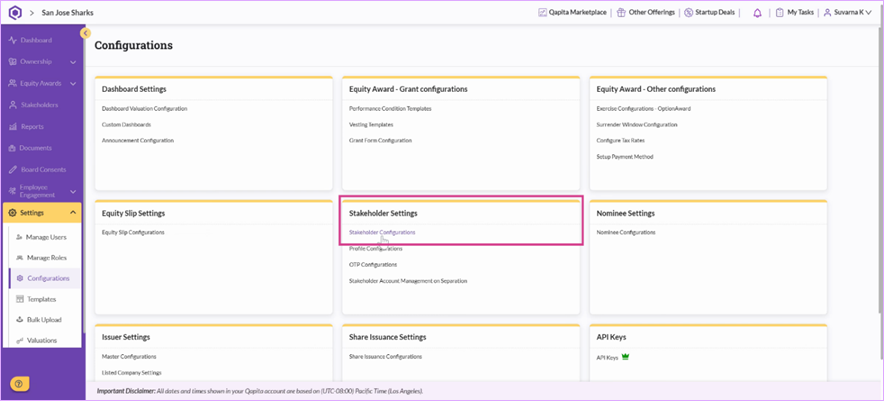
Click on Stakeholder Settings. You'll reach a screen for setting up both individual and institutional stakeholders.
Under Individual Stakeholders, you’ll find a list of non-editable sections such as Personal Details, Address Details, Country (pre-defined), and Payment Configurations (automatically enabled for employees).
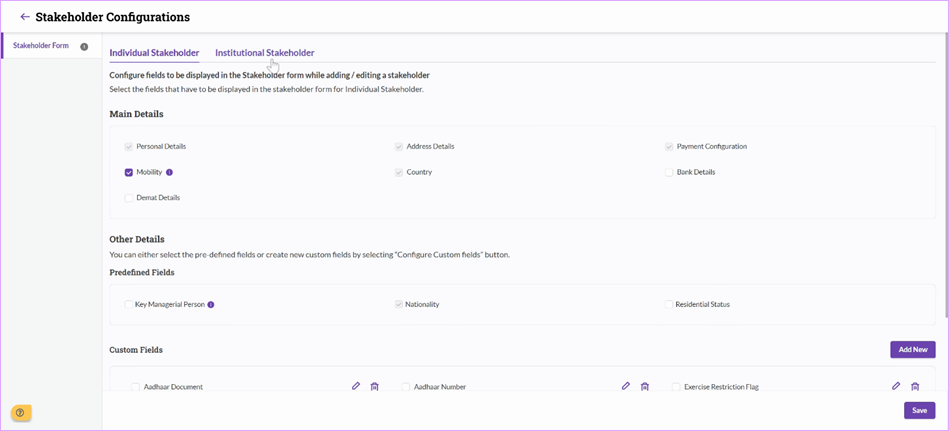
In the Custom Fields section, several pre-set fields are available. Add new custom fields whenever necessary. For example - Designation/Department etc.

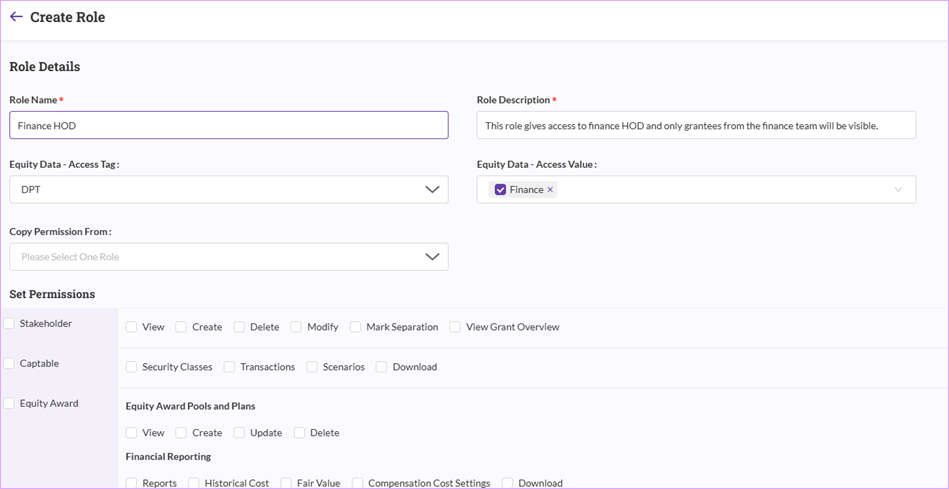
"Equity Access - Data" - You can choose to enable this check box if the custom field type is a dropdown. This Equity access will enable you to create a custom admin role and share access with department heads.
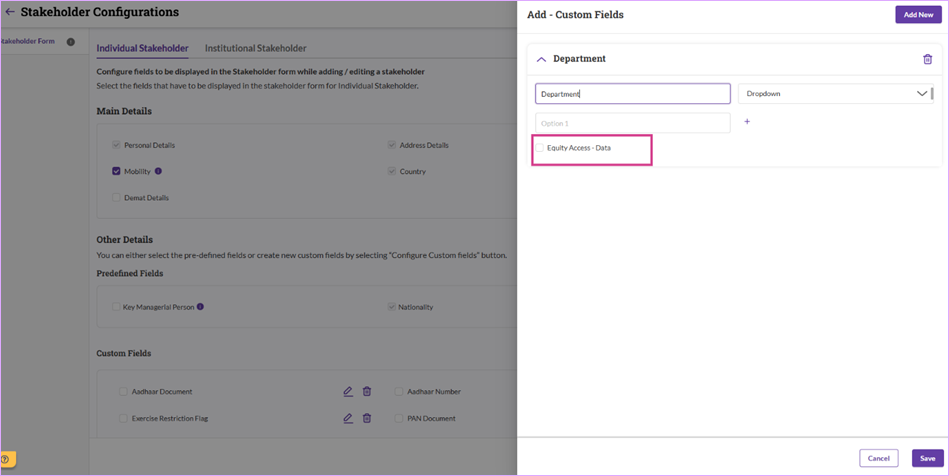
For example, a custom admin role with Finance department enables you to share access which contains details of grantees only from the finance department. This is department level admin access setting, enabling you to create multiple custom admin roles.
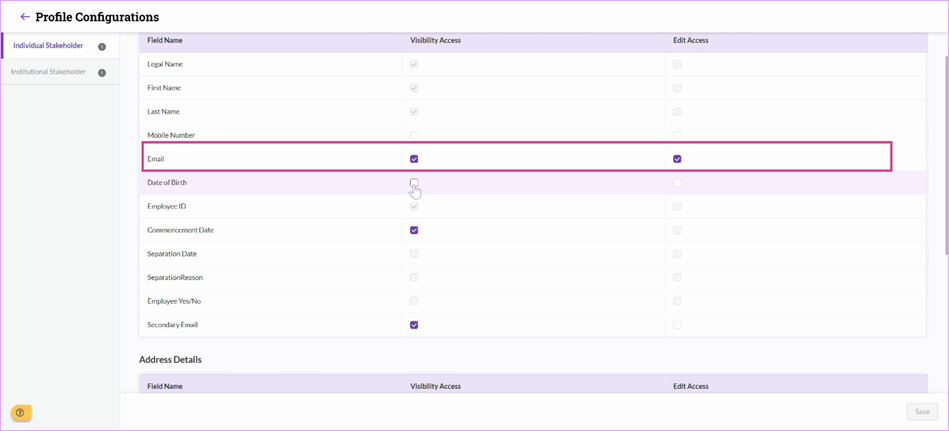
After making/adding fields to the stakeholders, system will throw a pop up to click on "Profile Configurations".

These configurations will help you adjust permissions of the fields. For example - If you do not want employees to edit the email, you can remove the check box and disabling the field. Once your settings are finalized, click Save
That's it! With Qapita, you're ready to manage stakeholders and profile settings seamlessly.
Things to Note
Fields with “M” tag indicates Mobility. These fields can be enabled to track employee movements between the entities.
Was this article helpful?
That’s Great!
Thank you for your feedback
Sorry! We couldn't be helpful
Thank you for your feedback
Feedback sent
We appreciate your effort and will try to fix the article