3.8 Payroll, Tax Management and Employee Movement
When participants exercise their stock plans, they typically owe income tax on the "compensation income" - the difference between the stock's current fair market value and the exercise price. Qapita helps manage this by allowing administrators to set up payroll and tax rates, so the system can calculate the estimated taxable amount. This is vital for accurate tax withholding and reporting to the IRS.
Additionally, Qapita's ability to handle mobility data (location history) is crucial for companies with employees who move between countries, as it ensures that payroll can calculate taxes correctly based on each employee's work location, helping comply with respective tax laws.
In this article, you'll learn how to add different tax rates and location-based tax rates on the platform.
|
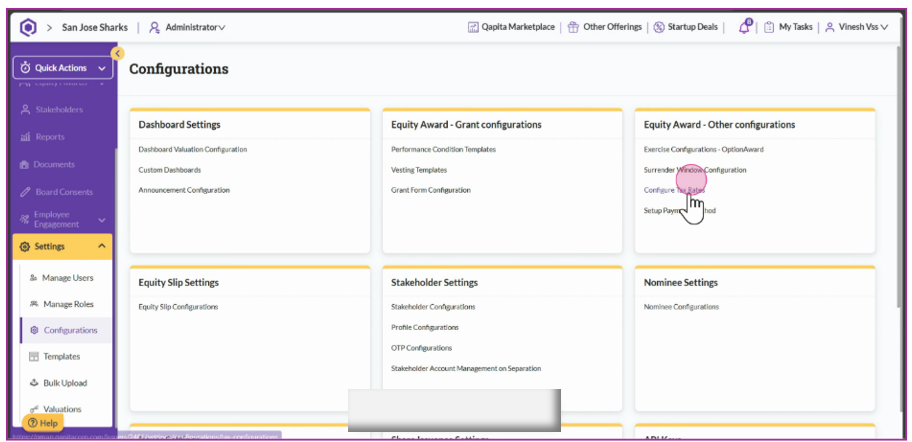
Step 1: Navigate to Settings > Configurations. Click on "Configure Tax Rates"
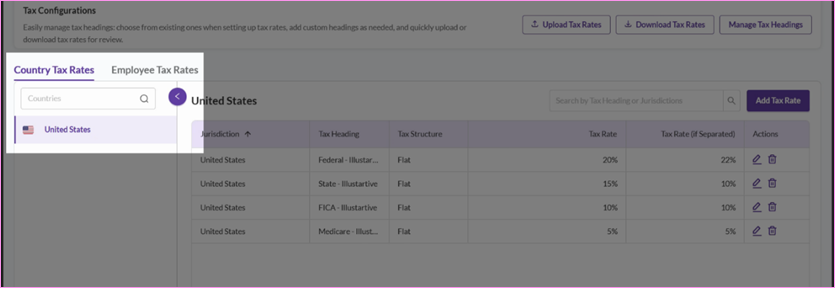
Step 2: Here, you'll see two different tax rates: Country tax rate and the Employee tax rate. The default country tax rate is set to the United States based on your account profile country of incorporation.
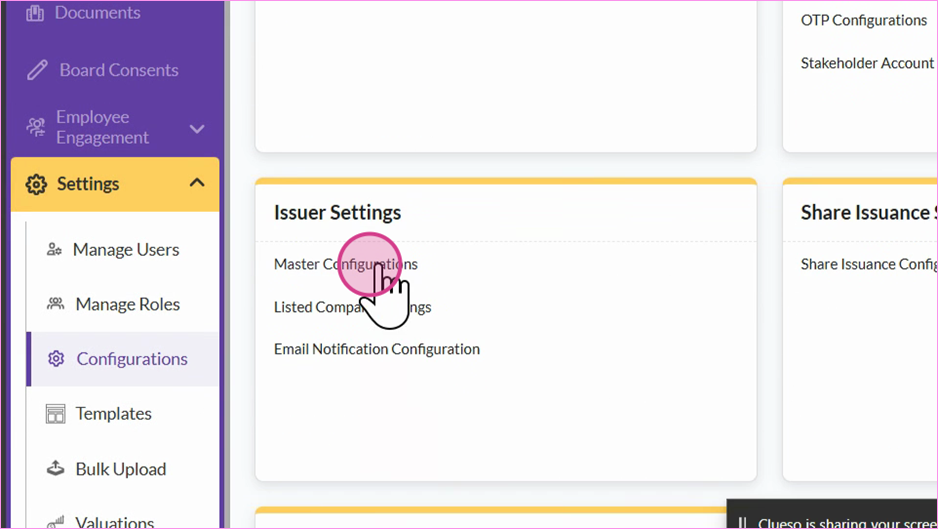
Step 3: To add more countries, go to the configuration sections. Click on Master Configuration.
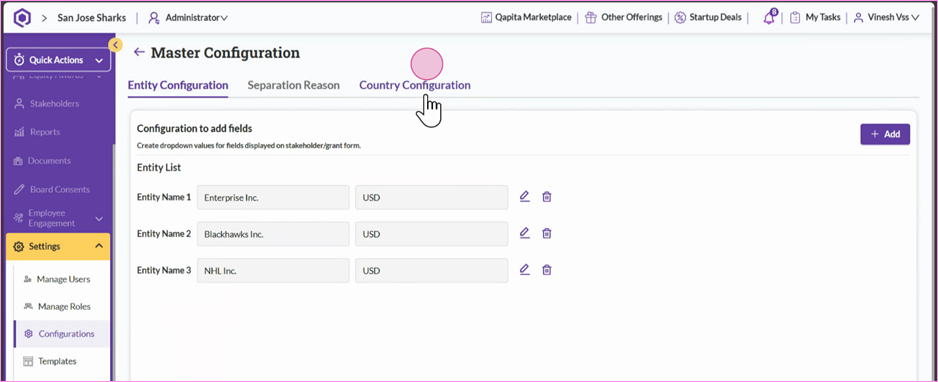
Step 4: Proceed to Country Configuration and add the desired countries
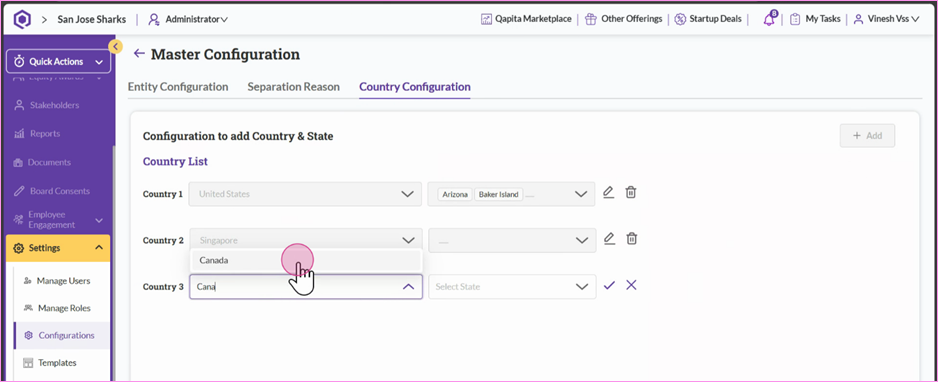
Step 5: Once you've added the countries, return to the tax configurations to check your changes.
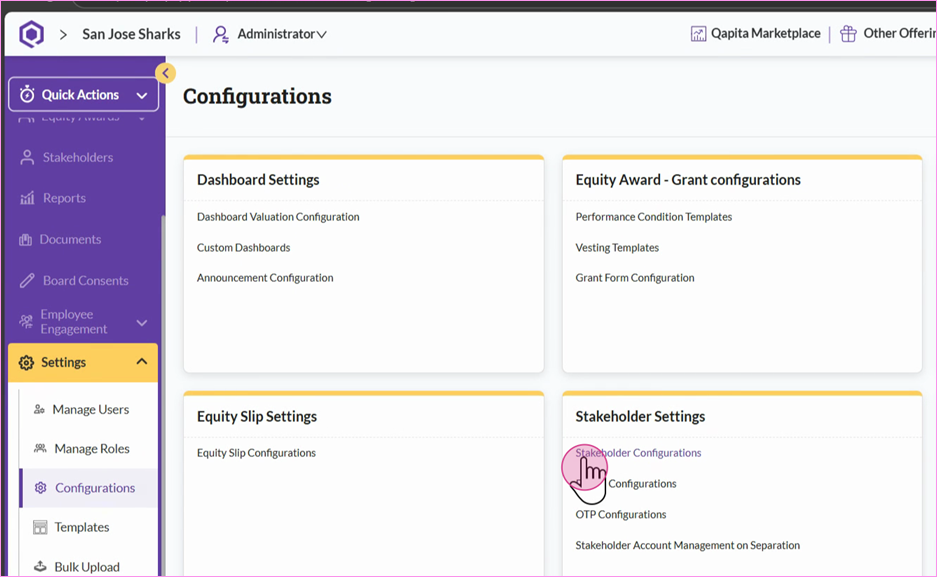
Step 6: To enable the system to identify an employee's country, go to the Stakeholder Configurations.
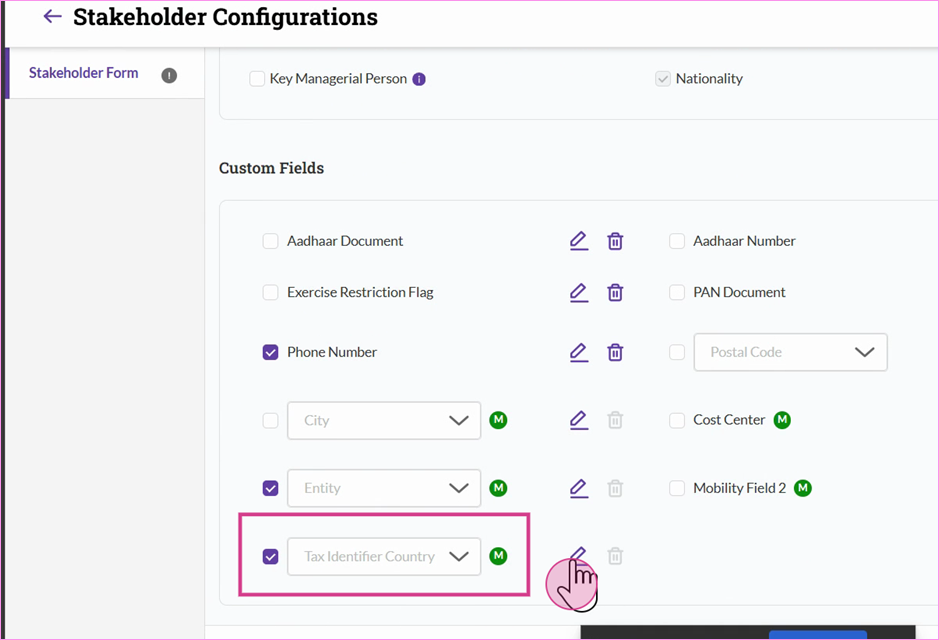
Step 7: Scroll down to the field labeled Tax Identifier Country and ensure the checkbox is checked. Click Edit to view the countries you've added.
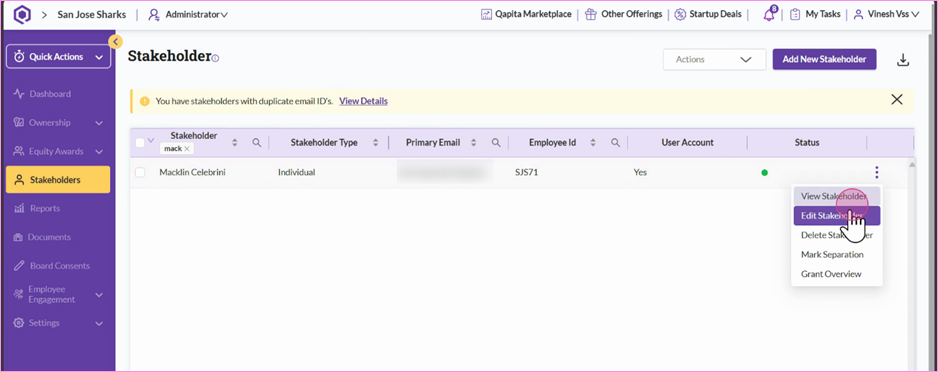
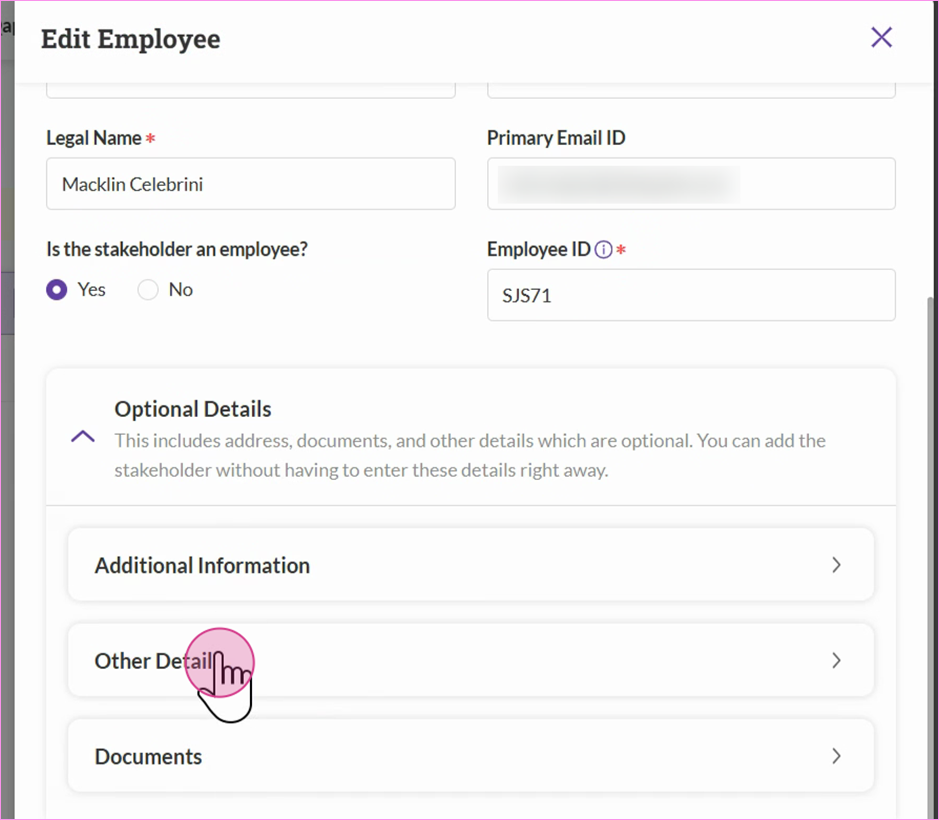
Step 8: To specify an employee's country, go to the Stakeholder Section. Select a stakeholder and click Edit.
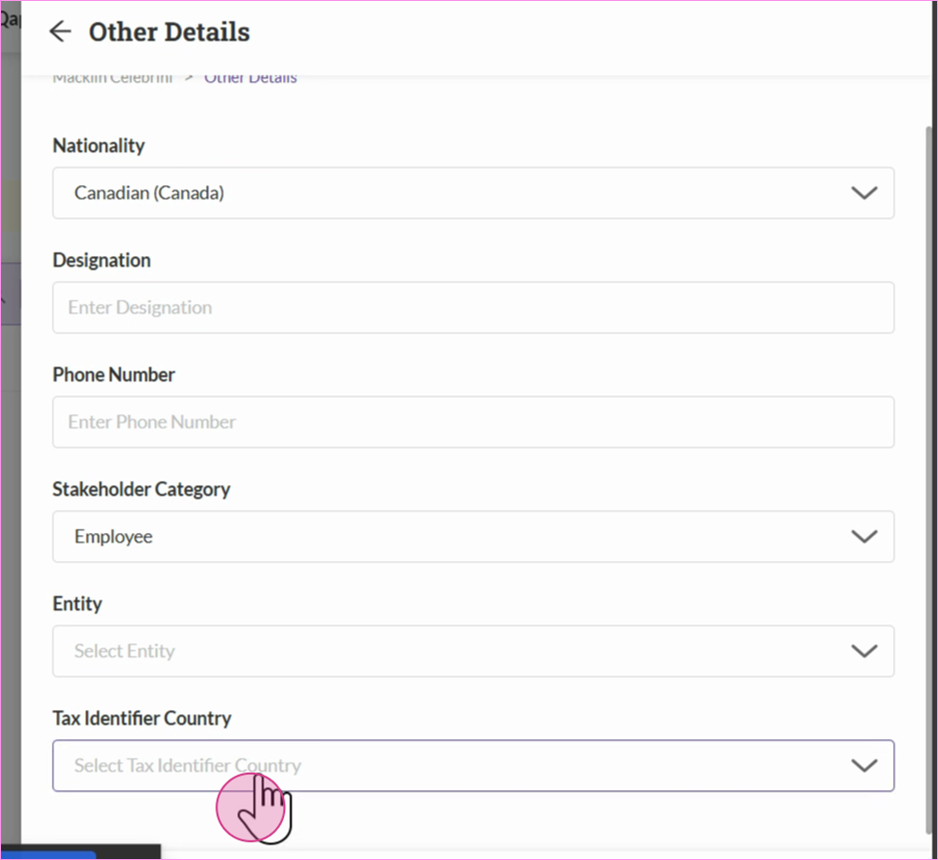
Step 9: Scroll down to other details and locate Tax Identifier Country field.
Step 10: Select the appropriate country and click "Save".
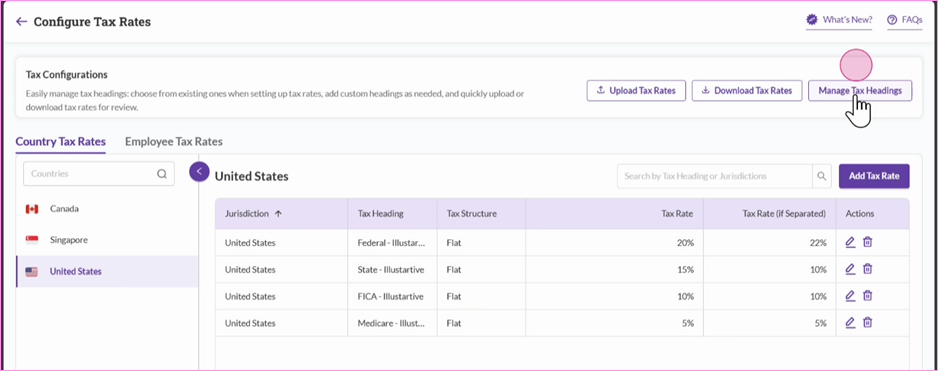
Adding Different Types of Tax for a Particular Country
Step 1: Click on Manage Tax Headings.
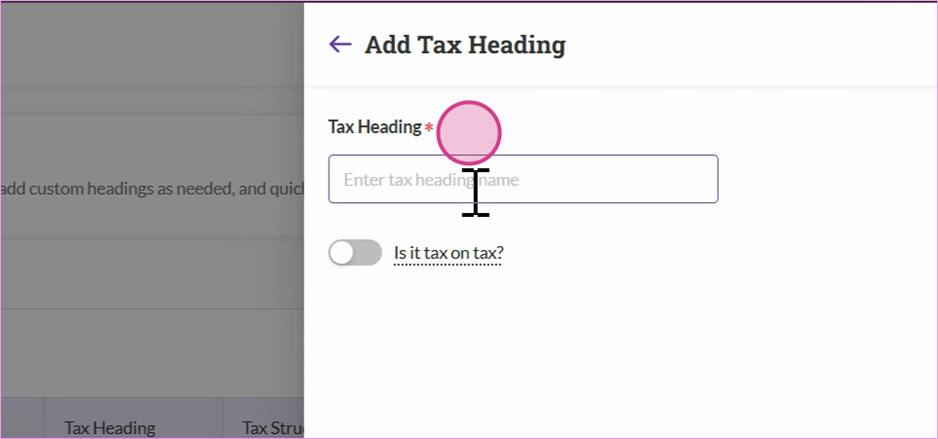
Step 2: Add a new tax heading.
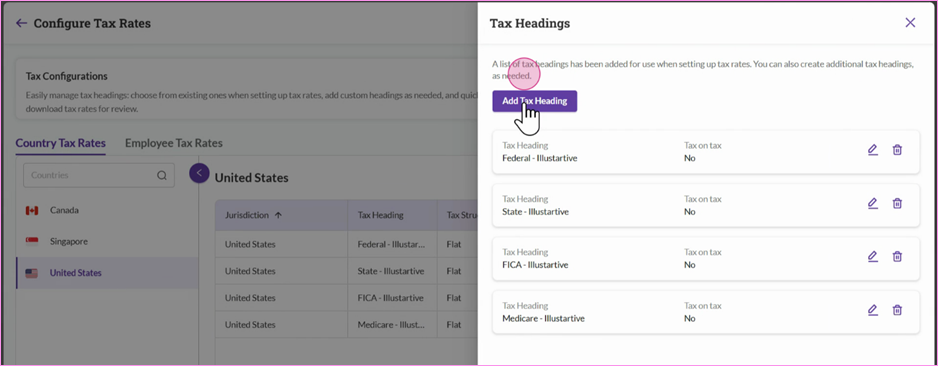
Mentioned the tax heading and save the details.
Things to Note
Tax on Tax is a layered effect. You pay one tax, like an excise tax, then another authority may add a tax on the total amount, which includes the first tax.
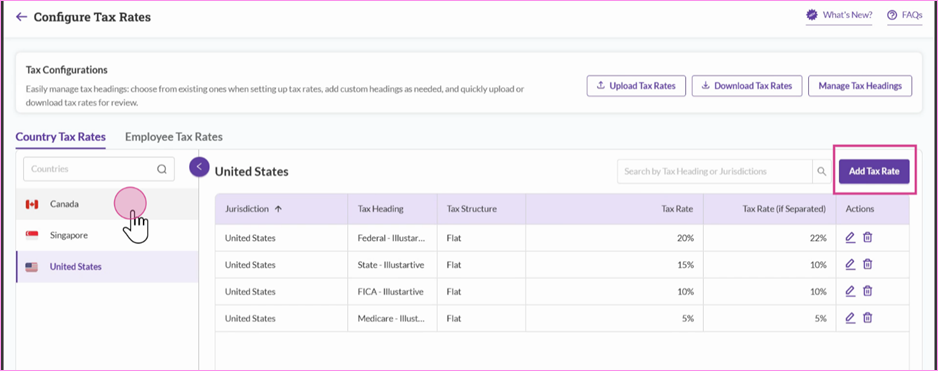
Assigning different tax rates for individual countries
Step 1: To add a specific tax rate for a country, select the country and click Add Tax Rate.
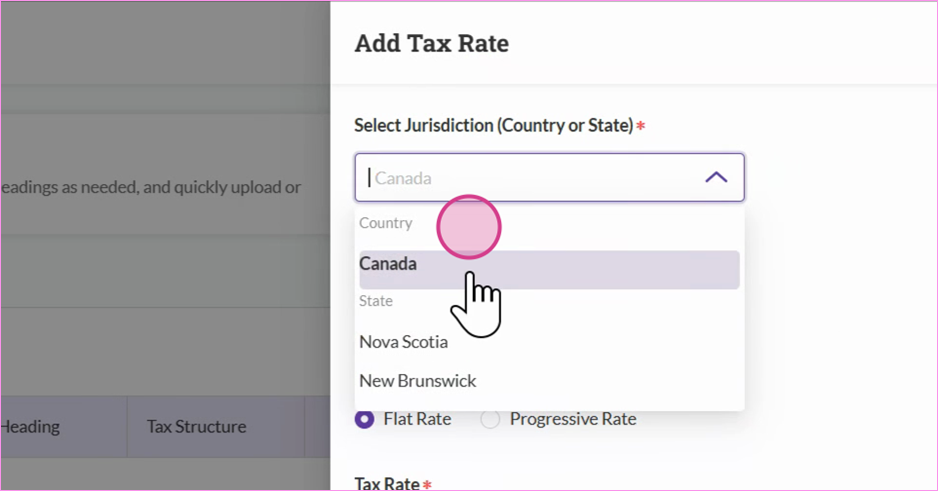
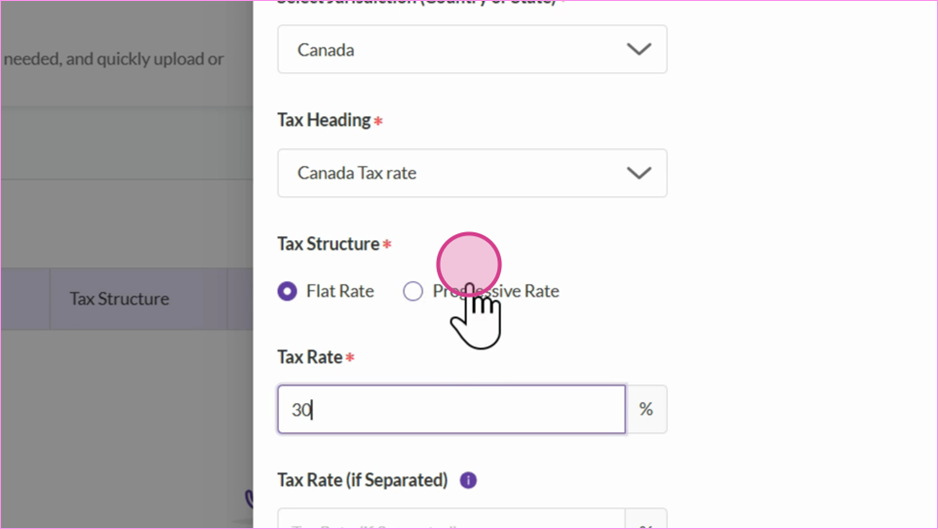
Step 2: Choose the country or state.
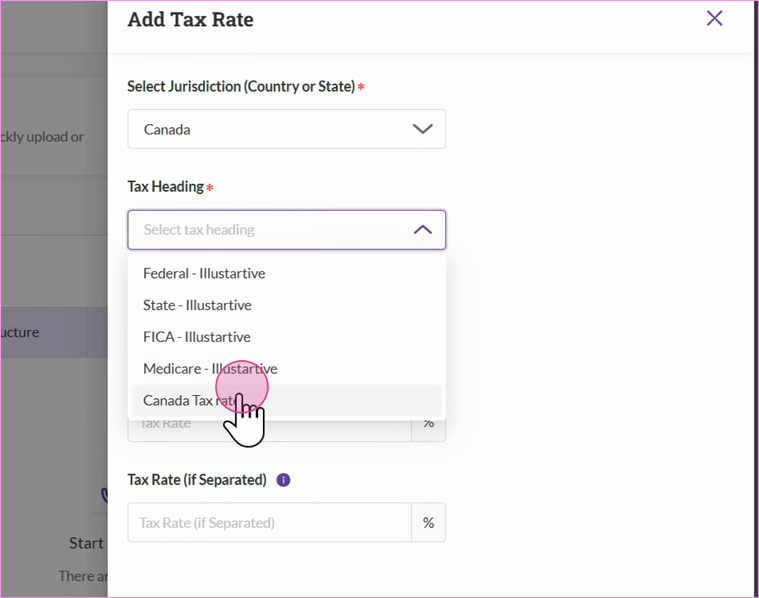
Step 3: Select the applicable tax heading for the selected country.
Step 4: Choose either a flat rate or a progressive rate for the tax.
Things to Note
For progressive tax rate, stakeholder payroll data is required to be uploaded.
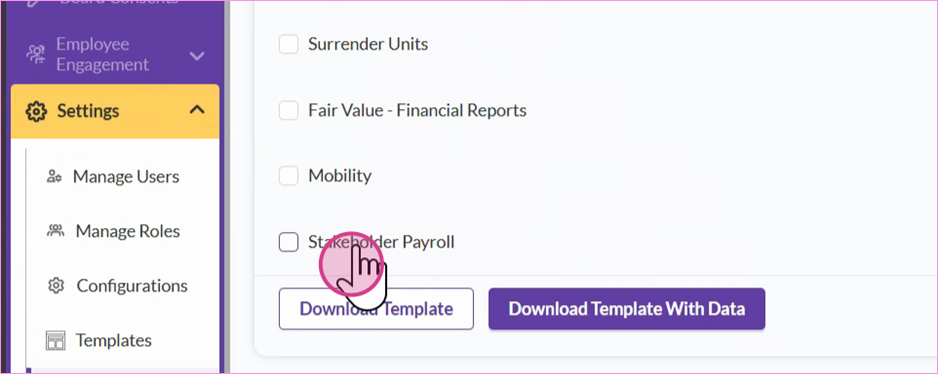
To add payroll data, go to go to Bulk Upload and select Stakeholder Payroll excel template.
If payroll data is not available, Tax rates at an employee level can be considered.
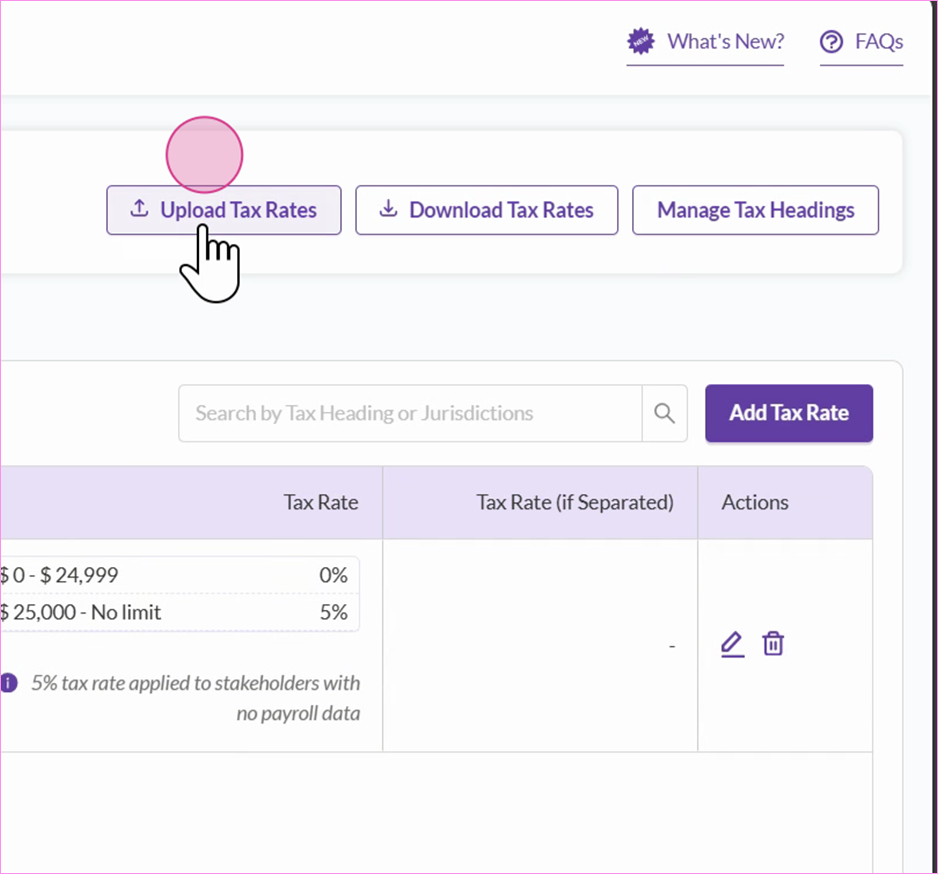
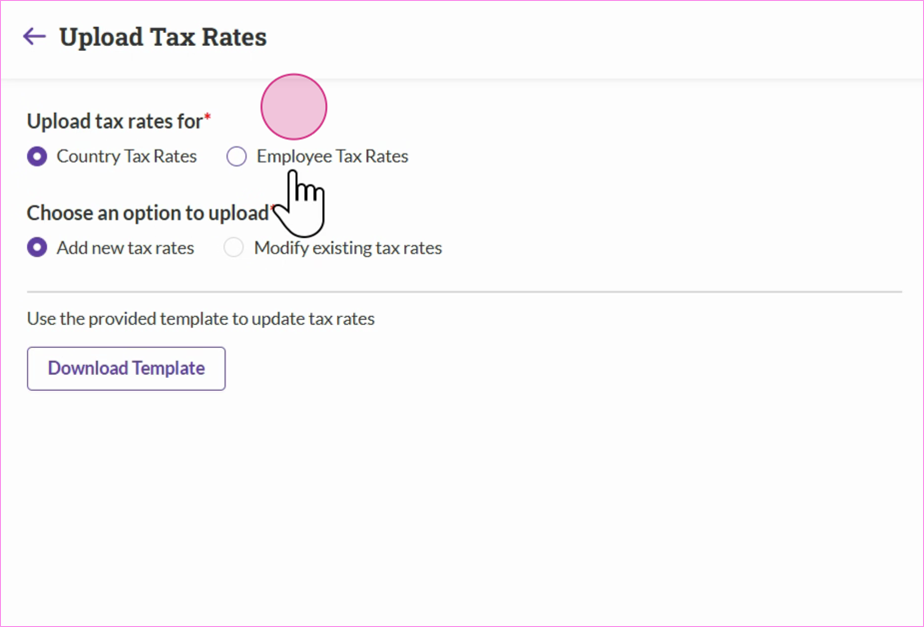
To upload tax rates at employee level - go to Upload Tax Rates.
Please download the provided template and upload the tax rates.
With the above steps - We have now completed the setup of tax rates at Country level and Employee level.
That's it! You've now learned how to add and manage tax rates on the platform. If you have any questions, don't hesitate to reach out.
Employee Movement
Cross‑entity moves change legal employer, tax withholding, plan eligibility, and vesting rules based on the entity. If you don’t track them consistently, you risk compliance errors, bad reporting, and confused employees. Centralizing mobility updates preserves data integrity across HR, Payroll, Finance, and Legal while keeping employees confident in their equity.
Qapita provides a structured workflow to record transfers across entities or locations with effective dates and retain a full movement history.
In this tutorial, you'll learn how to navigate and track mobility or employee movement on our platform.
|
Setting up Mobility
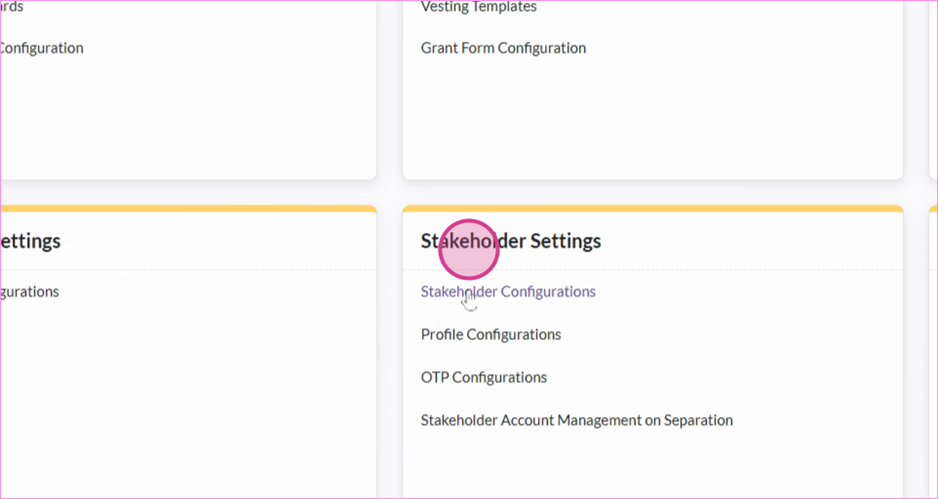
Step 1: Ensure that mobility and entities are tracked on the platform. Navigate to Settings.
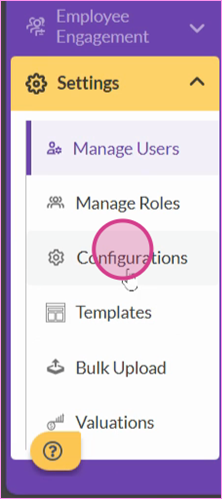
Step 2: Proceed to configurations.
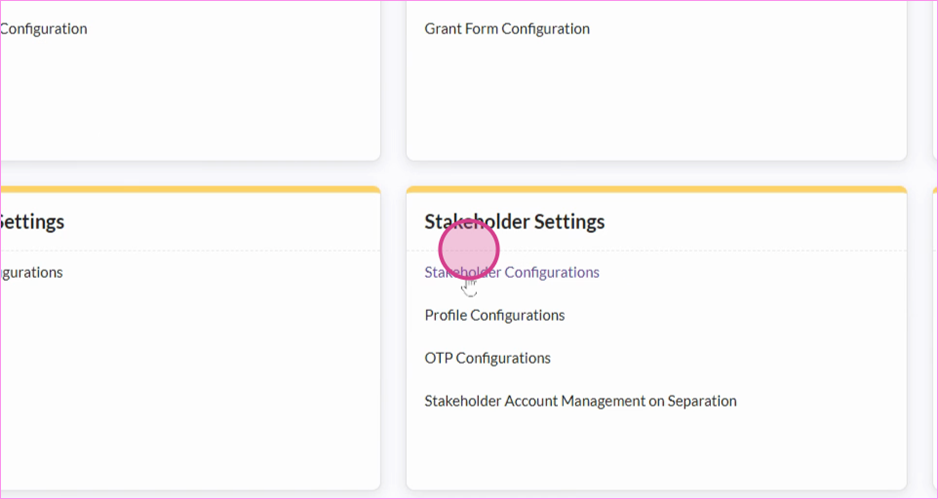
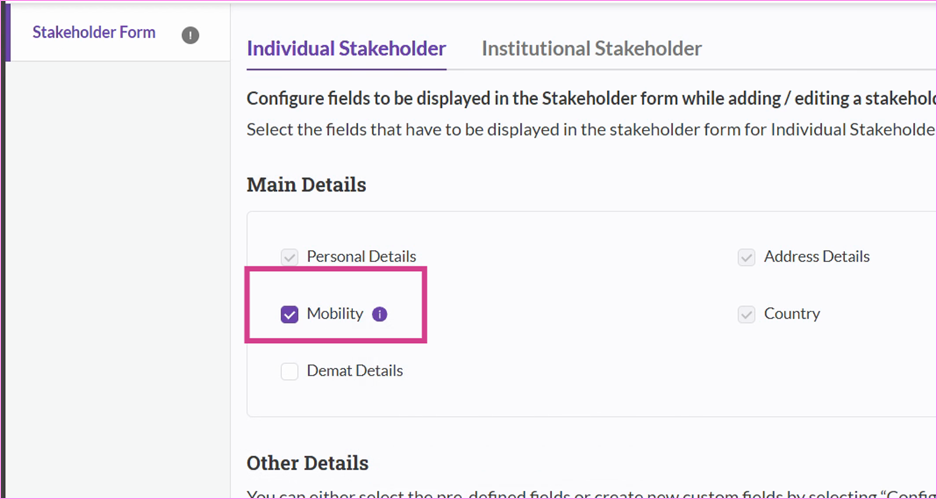
Step 3: Go to stakeholder configurations and enable mobility. This allows you to download bulk uploads and track mobility or employee movements.
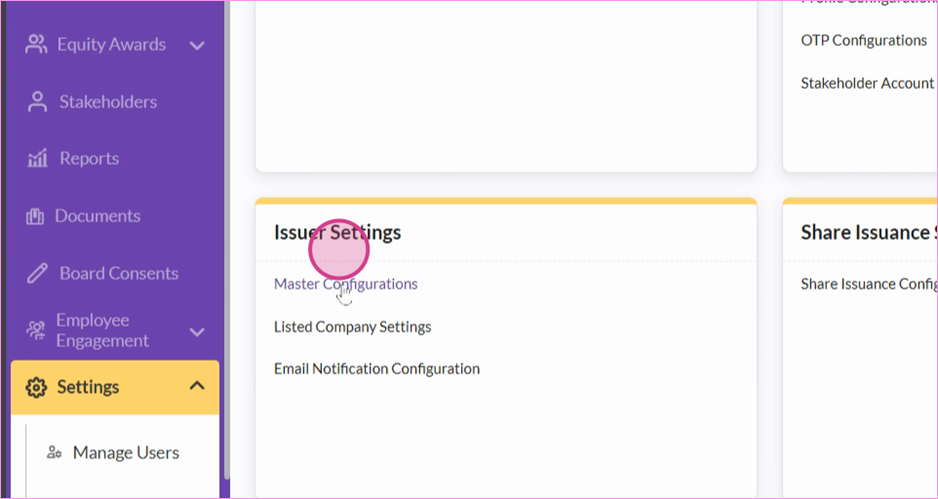
Step 4: To track entity movements, load the entity names on the platform under Master configurations.
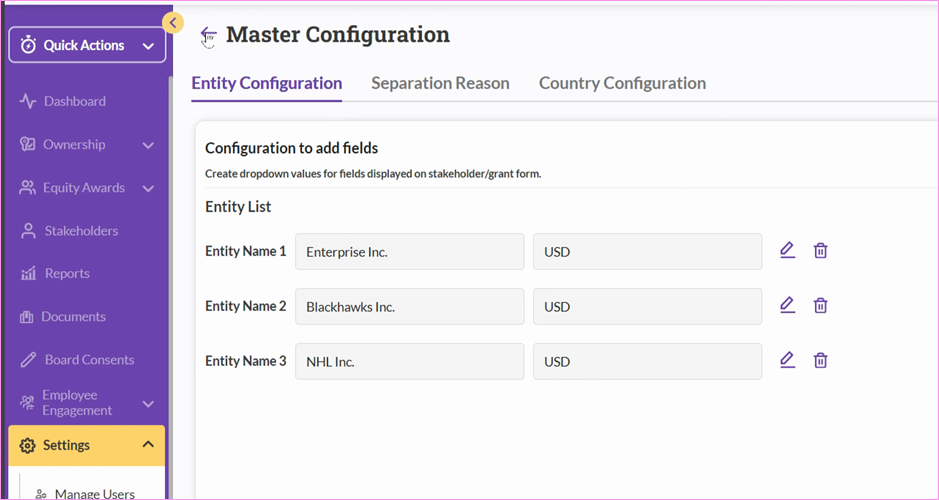
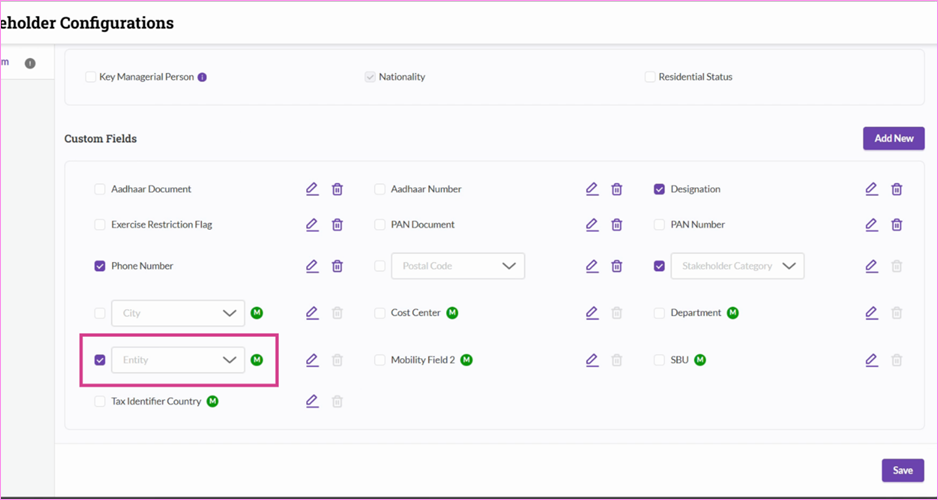
Step 5: After adding entities, check if the entity is enabled under stakeholder settings.
Scroll down to the custom fields and look for a field with a tag "M". This indicates that these fields are connected to mobility. Ensure the entity is enabled, you can add a department, business unit, or cost center. Remember to save your settings before adding entities at an employee level.
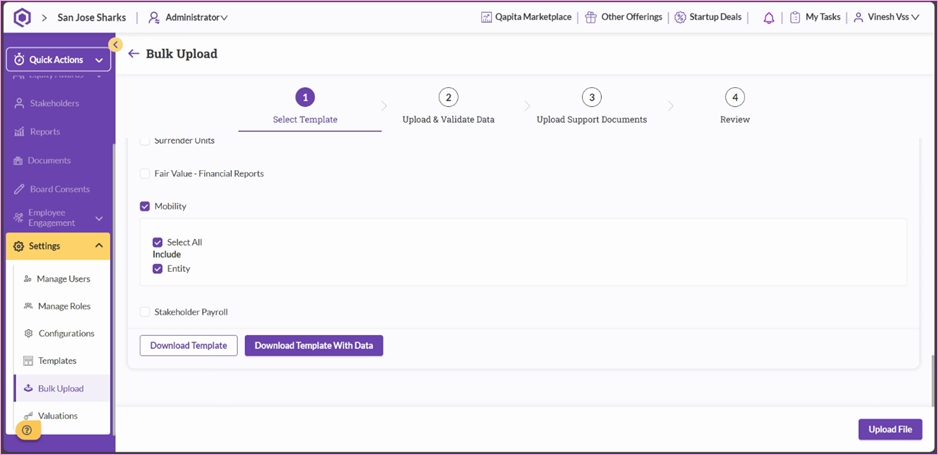
Step 6: To load the historical employee movement or a new employee movement, please click on Bulk upload.
Scroll down to find Mobility bulk upload. Click on mobility. If there are other fields you'd like to include, like department, enable them from the configurations first. Download Template with data gives you a blank Excel format sheet, while the second provides existing employee movements data.
Step 7: Fill in the Excel sheet with the necessary data points. Start with the employee ID, then the legal name. While adding entities, you can add the entire history of movements for a particular employee.
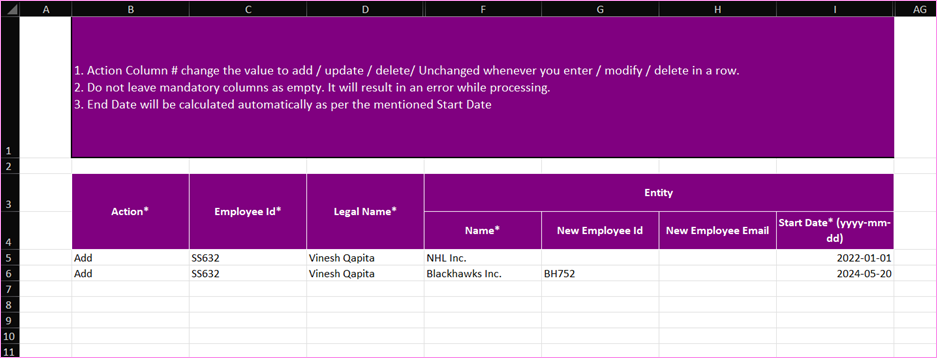
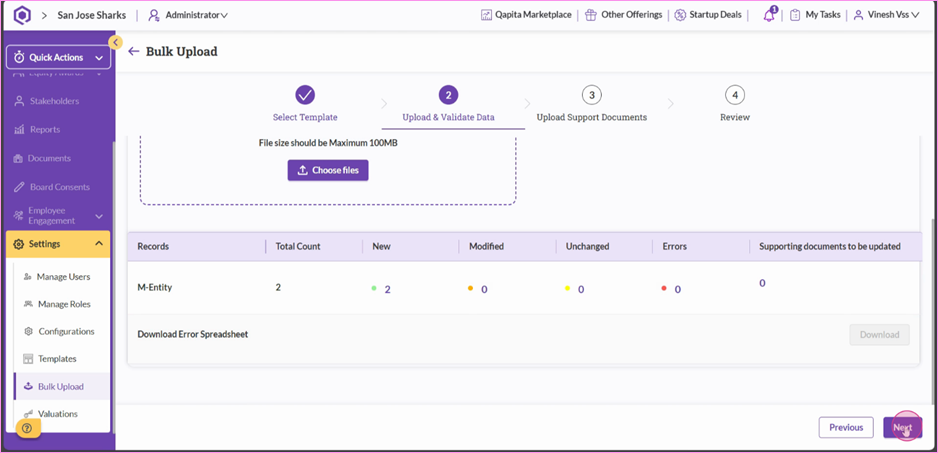
Step 8: Save your changes, close the Excel sheet, and click on upload file. Upload the file with your changes. The system will provide a summary of any errors or modifications. Click on next to upload the data.
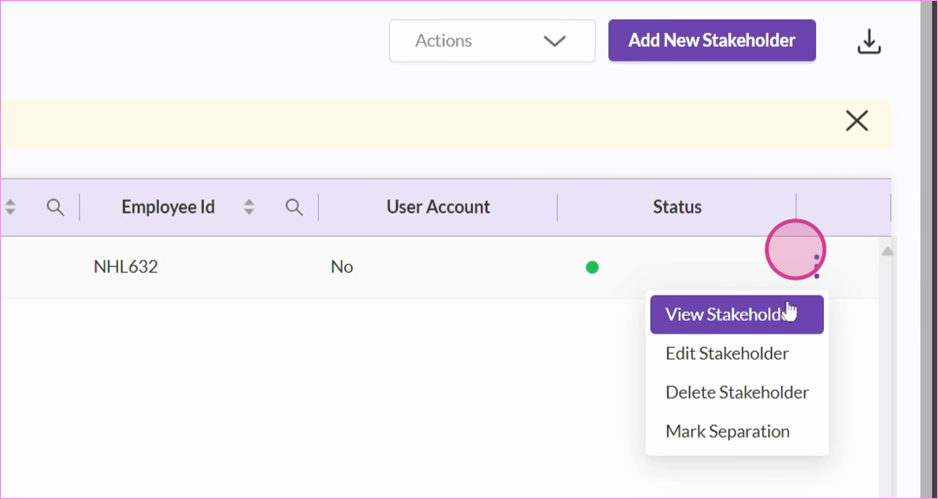
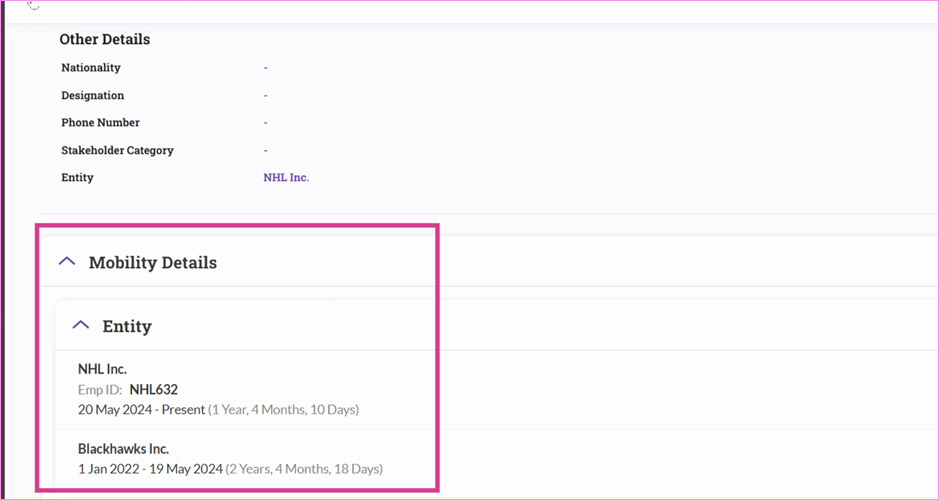
Step 9: To view the mobility details at an employee level, go to stakeholders. Search for the employee, view their profile, and scroll down to mobility details.
Here, you can see the duration of service at each entity.
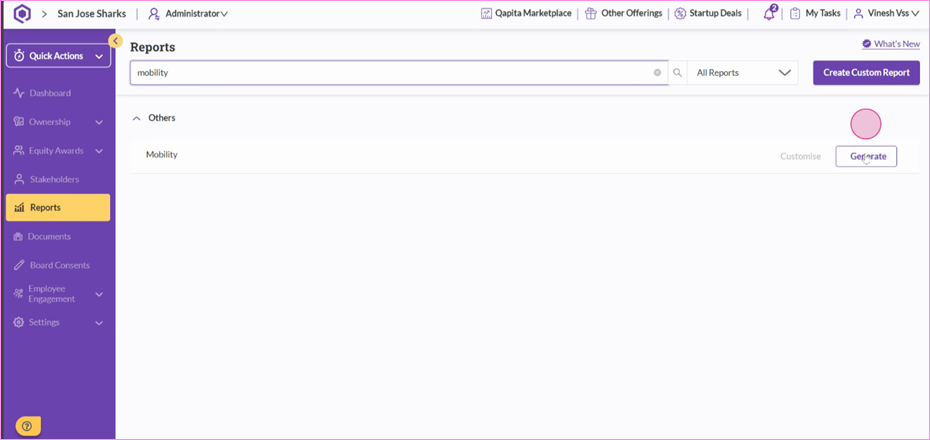
To download a report, visit the report section. Search for mobility, click on Generate to get a list of all employees and their movements between entities.
This completes the tutorial on how to track mobility or employee movements on our platform. If you have any questions, please let us know.
Was this article helpful?
That’s Great!
Thank you for your feedback
Sorry! We couldn't be helpful
Thank you for your feedback
Feedback sent
We appreciate your effort and will try to fix the article